
Let’s take a look at an amazing home office furniture makeover before and after. I’ll be honest, I was nervous because this was a big project. Taking on a furniture makeover that was bigger than any other I’ve done.
I love the idea of refurbishing a tired, dated, worn piece of furniture, reducing, reusing, and upcycling. Making the old look new and exciting.
The Office Furniture Before
My husband works from home so having furniture that makes his work days comfortable is really important. Plus my favorite … style, you know the pretty is important to me. Style and function are two key elements when creating a beautiful space.
The office furniture before was a solid piece worth updating. It was a piece we had seen at a store several years ago, a piece we loved and luckily found secondhand. We had used the piece for several years. It was traditional in style and something I loved for a long time until I got tired of the look and was ready for a modern update.

Because it was such a big piece I needed to trust myself and believe that I would make it happen. To get the look I wanted it would require more taking apart than adding too.
Less Is More
Because the piece was so traditional with rod iron, mini corbels, hardware, and glass I wanted to remove all the additional pieces, so it was more simple and modern.
It was a piece we were using so I needed to start taking things apart and then figure out the stages to put it back together. The desk and hutch were a combined piece that I wanted to make separate units. Because we didn’t have all the answers there was going to be some figuring out as we go.
The beginning steps were taking off the rod iron, corbels, hardware, and glass. Thankfully the corbels and rod iron were screwed in so they were easy to remove. It was a little time-consuming because there were so many pieces but not a hard project.


Separate Pieces for a Modern Look
Removing the desk from the hutch and creating a beautiful free-standing piece was a beginning step. The desktop was beautiful, I found beautiful metal legs and then made some adjustments to the desktop trim to fill in where it was attached to the hutch.

Thankfully some of the trim pieces that were removed from the hutch shelves were the perfect silhouette for the desk. The hardest and funniest part of DIY is figuring it out as you go. Even when you think you have it all figured out you always have stuff popping up that needs adjusting.

Before we took it apart I was sure to find metal legs that would work for the look and size I was after. There was a little bit of patching that needed to happen but because I was stripping and staining the desktop I knew we could make it stunning.

After the desk was removed, stripped, and stained we added the legs and made the adjustments necessary so they would work.

These metal legs were heavy and substantial enough for this solid desk. You can get them Here.
Take Away Then Add a Little
To create the modern look I was desiring there was a lot of removal but there were a couple of things that needed to be added. The modern feel I was after meant we needed to take off the rounded trim and add some square pieces.
Some of the decorative wood was mdf but the structure of the desk and hutch was solid wood so it was worth updating.


This was the only place we added wood to the hutch. A front trim to the shelves, is a simple addition for a beautiful finish.

Sand, Fill and Clean
Because the hutch was going to be painted it didn’t need to be filled and sanded. Fill in the holes left by decorative pieces and the decorative cracks on the drawers.
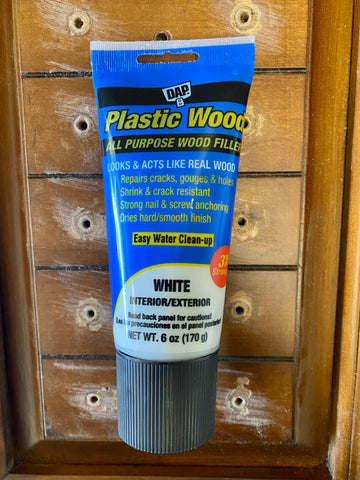

The plastic wood filler dries hard and can be sanded. It also comes in many colors. We had white so that is what I used. Not a problem because we were going to paint it. Grab your wood filler Here.
It’s now time to sand, just enough to rough up the finish so the paint would adhere. Because it was such a big piece the sanding took a lot of time. There were six separate pieces, Three base pieces, and three top pieces. Plus shelves, drawers, and doors.


After a Saturday of sanding with my favorite sand because it fits nicely in my hand and isn’t too heavy it was time to clean the furniture. I love my mouse sander you can find one here.
It was then time to wipe off all the pieces so they had a beautiful finish.
To start I used the air hose and blew everything off, then damp shop towels to get it to wipe off all the dust and sawdust. The blue shop towels are amazing because they last and last. Get yours here. This was such a time-consuming step but one you don’t want to skip. Because the wood has been sanded it will look dirty even if it is wiped clean.
Prime and Light Sanding
Since it is a piece that will get a lot of use I wanted to make sure the paint didn’t get scratched or chipped I took the time and used a primer. The primer will help the final paint adhere beautifully to the paint.
This primer worked really well.

There are so many primers out there but I asked my paint pro at Home Depot for suggestions. When I painted with the primer I noticed how much tackier it was than normal paint which is exactly what was necessary.
To get a professional finish you want to give it a light sanding, using a fine sanding sponge. When you paint wood it will lift the wood fibers making it a little rougher. It is so easy to sand the wood lightly but the difference it makes is huge. As you lightly sand rub your hand over the wood and you will easily feel the spots that need to be touched up. Trust me this will take your project to a new level of awesome.
Get your sanding pad here.
Painting for a Modern Look
Now that the pieces refinished, sanded, and primed it’s time to paint for the beautiful modern office furniture update. I knew what color I was going to use, a beautiful black I’ve used throughout my home. Creates a cohesive look in my home.
When you take the time to do the prep work properly it makes the final stage of painting much easier. I like to use a quality short-handle brush to get in all the edges and grooves then a mini roller for a smooth finish.
The products I use for the beautiful modern finish are a short-handle paint brush, a 6″ roller, and a tray.


Using the short-handle paint brush is key when working in tight spaces. I worked in sections, not letting the paint dry too much before I started rolling over the brushwork. Because I painted a beautiful rich black it did require three coats. The first taking the longest.
Be sure to paint between each coat of paint and let them dry well. Which I’m not always the best at.


Can you believe the change? It was a big one but I am loving the finished product. It has changed the look and feel of this space.

